[C/C++] 상속(Inheritance)

1. 상속의 개요
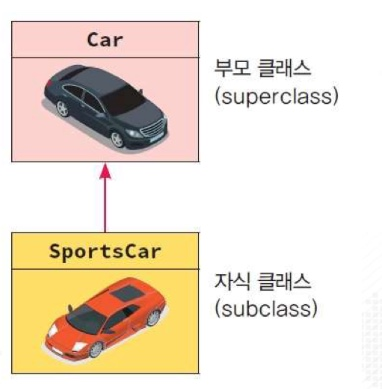
- 상속(inheritance)이란 이미 존재하는 클래스로부터 멤버들을 물려받는 것을 말한다.
- 이미 존재하는 클래스를 부모 클래스(parent class = super class = base class), 상속받는 클래스를 자식 클래스(child class = sub class = derived class) 라고 한다.
-
// 예시)
class ChildClass : 접근 지정자 ParentClass {
	...	// 추가된 멤버 변수와 멤버 함수
}

// ====================================

class Car {
	int speed;
};

class SportsCar : public Car {
	bool turbo;
}
- 자식 클래스는 부모 클래스가 가지고 있는 모든 멤버들을 전부 상속받고 자신이 필요한 멤버를 추가하기 때문에 항상 자식 클래스가 부모 클래스를 포함한다.
- 상속의 강점은 부모 클래스로부터 상속된 특징들을 자식 클래스에서 추가, 교체, 상세화시킬 수 있다는 것이다.
2. 상속이 필요한 이유
상속은 객체지향 프로그래밍에서 중요한 개념 중 하나이다. 여러 이유로 상속을 사용할 수 있지만 주된 목적은 다음과 같다:
- 코드 재사용성: 기존 클래스의 속성과 동작을 새 클래스에서 다시 작성하지 않고 재사용할 수 있다.(중복 방지) 기존 클래스의 기능을 확장하거나 수정하여 새로운 클래스를 생성할 수 있다.
- 다형성(Polymorphism) 구현: 상속을 통해 다형성을 구현할 수 있다. 서로 다른 클래스가 동일한 이름의 메서드를 가지고 있을 때, 이들을 동일한 방식으로 호출하여 다른 동작을 수행하도록 할 수 있다.
- 계층 구조의 형성: 클래스 간에 계층 구조를 형성하여 코드를 조직화하고 관리할 수 있다. 부모 클래스와 그 자식 클래스들을 통해 추상화 수준을 지정할 수 있다. 상속은 여러 단계로 이루어질 수 있다.
+--------------+ | Vehicle | +--------------+ ^ ^ | | +------------+ +------------+ | | +-------------+ +-------------+ | Car | | Truck | +-------------+ +-------------+ ^ ^ | | +-------------+ +-------------+ | SportsCar | | Pickup | +-------------+ +-------------+
- 유연성: 코드를 확장하고 유지보수하는 데 있어서 유연성을 제공한다. 새로운 기능을 추가하거나 기존 기능을 변경할 때, 상속을 사용하여 클래스의 특정 부분만 수정할 수 있다.
상속은 객체지향 프로그래밍에서 중요한 개념이지만, 항상 필수적인 것은 아니다. 종종 코드의 복잡성을 증가시킬 수 있고 오용될 수도 있으므로 적절하게 사용해야 한다. 코드의 가독성과 유지보수성을 고려하여 상속을 사용하는 것이 옳다.
3. 자식 클래스와 부모 클래스
- 부모 클래스의 모든 멤버 변수와 멤버 함수가 자식 클래스로 상속받고 자식 클래스는 자신이 필요한 멤버를 추가하기 때문에 항상 자식 클래스가 부모 클래스를 포함한다.
- 상속의 강점은 부모 클래스로부터 상속된 특징들을 자식 클래스에서 추가, 교체, 상세화시킬 수 있는 것이다.
- 아래 Animal과 Dog, Cat과의 관계를 살펴보자.
   +-----------+
   |  Animal   |
   +-----------+
        ^
        |
  +-----+-----+
  |           |
+------+   +------+
| Dog  |   | Cat  |
+------+   +------+
이 그림에서 Animal 클래스는 Dog와 Cat 클래스의 부모 클래스이다. 이 둘은 Animal 클래스의 모든 속성과 기능을 상속받을 수 있다. 여기서 화살표는 상속 관계를 나타내며, 화살표의 방향은 부모 클래스에서 자식 클래스로 향한다.
상속을 통해 Dog와 Cat 클래스는 Animal 클래스의 속성과 메서드를 사용할 수 있으면서도 각각의 고유한 특성을 추가할 수 있다. 이것이 상속의 핵심적인 장점 중 하나이다.
4. 상속 예제
1. 자동차 계층 구조 만들기
using namespace std;
class Car {
int speed; // 속도
public:
void setSpeed(int s) { speed = s; };
int getSpeed() { return speed; };
};
// Car 클래스를 상속받아서 다음과 같이 SportsCar 클래스를 작성한다.
class SportsCar :public Car {
bool turbo;
public:
void setTurbo(bool newValue) { turbo = newValue; };
bool getTurbo() { return turbo; };
};
int main() {
SportsCar c;
c.setSpeed(60); // 부모 클래스 함수 호출
c.setTurbo(true); // 자식 클래스 함수 호출
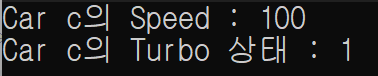
c.setSpeed(100);
cout << "Car c의 Speed : " << c.getSpeed() << endl;
cout << "Car c의 Turbo 상태 : " << c.getTurbo() << endl;
return 0;
}
2. 도형과 사각형

#include <iostream>

using namespace std;

class Shape {
    int x, y;  // 좌표
public:
    void setX(int val_x) { x = val_x; };
    void setY(int val_y) { y = val_y; };
};

// Shape 클래스를 상속받아서 다음과 같이 Rectangle 클래스를 작성한다.
class Rectangle :public Shape {
    int width, height;

public:
    void setWidth(int val_width) { width = val_width; };
    void setHeight(int val_height) { height = val_height; };
    int getArea() { return width * height; };
};

int main() {
    Rectangle r;

    r.setX(100);
    r.setY(50);

    r.setWidth(50);
    r.setHeight(30);

    cout << "Rectangle r의 넓이 : " << r.getArea() << endl;

    return 0;
}
5. 상속에서의 생성자와 소멸자
자식 클래스의 객체가 생성될 때에 당연히 자식 클래스의 생성자는 호출된다. 그러나 그 전에 자식 클래스의 생성자에서 제일 먼저 하는 일이 부모 클래스의 생성자를 호출하는 것이다. 특별히 지정하지 않으면 부모 클래스의 기본 생성자가 호출된다.
즉 정리하자면,
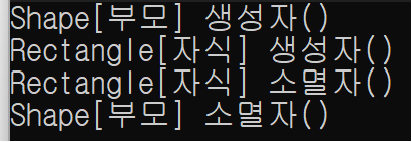
- 객체가 생성될 때 자식 클래스 생성자가 실행이 되는데, 실행되는 순간에 바로 부모 클래스 생성자가 실행이 되어서 자식 클래스가 부모 클래스의 모든 멤버들을 상속받게 된다.
- 객체가 소멸될 때 자식 클래스 소멸자가 소멸이 되는데, 소멸 되기 직전에 부모 클래스 소멸자가 실행이 된다.
-

자식 클래스, 부모 클래스의 객체 생성, 소멸 과정
#include <iostream>

using namespace std;

class Shape {
    int x, y;  // 좌표
public:
    Shape() { cout << "Shape[부모] 생성자() " << endl; };
    ~Shape() { cout << "Shape[부모] 소멸자() " << endl; };
};

// Shape 클래스를 상속받아서 다음과 같이 Rectangle 클래스를 작성한다.
class Rectangle :public Shape {
    int width, height;

public:
    Rectangle() { cout << "Rectangle[자식] 생성자()" << endl; };
    ~Rectangle() { cout << "Rectangle[자식] 소멸자()" << endl; };
};

int main() {
    Rectangle r;

    return 0;
}
부모 클래스의 생성자를 호출하는 방법
자식 클래스의 생성자 헤더의 뒤에 콜론(:)을 추가한 후 원하는 부모 클래스의 생성자를 적으면 된다.
ex)
자식클래스의 생성자() : 부모클래스의 생성자(){
	....
}

Rectangle(int x = 0, int y = 0, int w = 0, int h = 0) : Shape(x, y){
	width = w;
    height = h;
}
예제1 : 부모 클래스의 생성자를 호출하는 방법
#include <iostream>

using namespace std;

class Shape {
    int x, y;  // 좌표
public:
    Shape() { cout << "Shape[부모] 생성자() " << endl; };
    Shape(int xloc, int yloc) : x{ xloc }, y{ yloc } {
        cout << "Shape[부모] 생성자(xloc, yloc) " << endl;
    }
    ~Shape() { cout << "Shape[부모] 소멸자() " << endl; };
};

class Rectangle : public Shape {
    int width, height;
public:
    Rectangle(int x, int y, int w, int h) : Shape(x, y) {
        width = w;
        height = h;
        cout << "Rectangle[자식] 생성자(x, y, w, h)" << endl;
    }
    ~Rectangle() {
        cout << "Rectangle[자식] 소멸자()" << endl;
    }
};

int main() {
    Rectangle r(0, 0, 100, 100);

    return 0;
}
예제2 : 컬러 사각형
사각형을 Rect 클래스로 나타내자. 이 클래스를 상속받아서 컬러 사각형 ColoredRect을 정의해보자. ColoredRect 클래스를 이용하여 화면에 다음과 같은 색깔있는 사각형을 그려보자.

#include <iostream>
#include <Windows.h>

using namespace std;

class Rect {
protected:
    int x, y, width, height;
public:
    Rect(int x, int y, int w, int h) : x(x), y(y), width(w), height(h) {}
    void draw() {
        HDC hdc = GetWindowDC(GetForegroundWindow());
        Rectangle(hdc, x, y, x + width, y + height);
    }
};

class ColoredRect : Rect {
    int red, green, blue;
public:
    ColoredRect(int x, int y, int w, int h, int r, int g, int b) :
        Rect(x, y, h, w), red(r), green(g), blue(b) {};
    void draw() {
        HDC hdc = GetWindowDC(GetForegroundWindow());
        SelectObject(hdc, GetStockObject(DC_BRUSH));
        SetDCBrushColor(hdc, RGB(red, green, blue));
        Rectangle(hdc, x, y, x + width, y + height);
    }
};

int main() {
    ColoredRect r2(200, 200, 80, 80, 255, 0, 0);
    r2.draw();

    return 0;
}
6. 접근 지정자
| 접근 지정자 | 자기 클래스 | 자식 클래스 | 외부 |
| private | O | X | X |
| protected | O | O | X |
| public | O | O | O |
[아래 내용을 정리한 표 - 접근 지정자별 상속 받음에 따른 권한 여부]
- 멤버 변수를 접근하려면 접근자와 설정자라고 하는 특수한 멤버 함수를 사용하여야 한다.
- 이 때 오류 방지를 위해 외부에서는 접근하지 못하지만 자식 클래스는 접근하게 하는 새로운 접근 지정자가 필요하다.
접근제어자 기본 개념(접근 범위 : private < protected < public)
접근제어에 관한 자세한 내용은 생성자와 접근제어 파트에서 확인하자.
- private
- 객체의 멤버를 외부에 공개하지 않고 직접적인 접근 또한 불가능하게 한다.(정확히 그 클래스에서만 사용가능)
- 상속에 적용할 때, private 제한자보다 접근 범위가 넓은 (public, protected) 멤버는 모두 private 제한자로 바꾸어 상속된다.
-
#include <iostream>
#include <Windows.h>

using namespace std;

class Atype {
private:
    int a;
protected:
    int b;
public:
    int c;
    Atype() : a{ 0 }, b{ 0 }, c{ 0 } {};
};

class Btype : private Atype {
public:
    int d;
    Btype() {
        a = 3; // 부모 클래스의 private 멤버에 접근 불가 (오류 발생)
        b = 2; // 자식 클래스의 private 멤버로 상속 -> 접근 가능
        c = 1; // 자식 클래스의 private 멤버로 상속 -> 접근 가능
    }

    void showValue() {
    // this가 접근할 수 있는 변수는 private 멤버 b, c, public 멤버 d 뿐이다.
        cout << this->b << endl;
        cout << this->c << endl;
        cout << this->d << endl;
    }
};

int main() {
    Btype btype;

    // btype에 접근할 수 있는 변수는 Btype의 public 멤버인 d와 public 함수인 showValue() 뿐이다.
    btype.a = 2; // a는 부모 클래스 Atype의 private이므로 접근 불가 (오류 발생)
    btype.b = 5; // b는 Atype에서 Btype으로 private 멤버로 상속받았기 때문에 외부에서 접근 불가 (오류 발생)
    btype.c = 7; // c는 Atype에서 Btype으로 private 멤버로 상속받았기 때문에 외부에서 접근 불가 (오류 발생)
    btype.d = 10; // d는 Btype의 public 멤버이므로 접근 가능
    btype.showValue();
    return 0;
}
- protected
- private의 기능을 수행하면서 상속한 하위 클래스에 대해서는 접근을 가능하도록 해주는 제어자
- 상속에 적용할 때, protected 제한자보다 접근 범위가 넓은 (public) 멤버는 모두 protected 제한자로 바꾸어 상속
-
#include <iostream>
#include <Windows.h>

using namespace std;

class Atype {
private:
    int a;
protected:
    int b;
public:
    int c;
    Atype() : a{ 0 }, b{ 0 }, c{ 0 } {};
};

class Btype : protected Atype {
public:
    int d;
    Btype() {
        a = 3; // 부모 클래스의 private 멤버에 접근 불가 (오류 발생)
        b = 2; // 자식 클래스의 protected 멤버로 상속 -> 접근 가능
        c = 1; // 자식 클래스의 protected 멤버로 상속 -> 접근 가능
    }

    void showValue() {
    // this로 접근할 수 있는 멤버는 public 변수인 d와 자식 클래스의 protectd 멤버로 상속받은 b, c이다.
        cout << this->b << endl;
        cout << this->c << endl;
        cout << this->d << endl;
    }
};

int main() {
    Btype btype;
    // 외부에서의 접근 시도 -> d와 showValue() 만 접근 가능하다.
    btype.a = 2; // a는 Atype 클래스의 private이므로 접근 불가 (오류 발생)
    btype.b = 5; // b는 Atype에서 Btype으로 protected 멤버로 상속 받았기 때문에 외부에서 접근 불가 (오류 발생)
    btype.c = 7; // c는 Atype에서 Btype으로 protected 멤버로 상속 받았기 때문에 외부에서 접근 불가 (오류 발생)
    btype.d = 10; // d는 Btype의 public 멤버이므로 접근 가능
    btype.showValue();
    return 0;
}
- public
- 멤버 변수 및 멤버 함수는 외부에 공개되어 아무 제약 없이 접근 가능하며 해당 객체를 사용하는 곳이면 어디서든 접근 가능
- public 제한자보다 접근 범위가 넓은 멤버는 모두 public 제한자로 바뀌어 상속되는데, public 보다 접근 범위가 넓은 것이 없으므로 무엇 하나 바뀌지 않고 그대로 상속
-
#include <iostream>
#include <Windows.h>

using namespace std;

class Atype {
private:
    int a;
protected:
    int b;
public:
    int c;
    Atype() : a{ 0 }, b{ 0 }, c{ 0 } {};
};

class Btype : public Atype {
public:
    int d;
    Btype() {
        a = 3; // 부모 클래스의 private 멤버에 접근 불가 (오류 발생)
        b = 2; // 자식 클래스의 protected 멤버로 상속 -> 접근 가능
        c = 1; // 자식 클래스의 public 멤버로 상속 -> 접근 가능
    }

    void showValue() {
        // this로 접근할 수 있는 멤버는 b, c, d 이다.
        cout << this->b << endl;
        cout << this->c << endl;
        cout << this->d << endl;
    }
};

int main() {
    Btype btype;
    // 외부에서의 접근 시도 -> c, d 와 showValue() 만 접근 가능하다.
    btype.a = 2; // a는 Atype 클래스의 private 변수이므로 접근 불가 (오류 발생)
    btype.b = 5; // b는 Atype에서 Btype으로 protected 멤버로 상속 받았기 때문에 외부에서 접근 불가 (오류 발생)
    btype.c = 7; // c는 Atype에서 Btype으로 public 멤버로 상속 받았기 때문에 외부에서 접근 불가 (오류 발생)
    btype.d = 10; // d는 Btype의 public 멤버이므로 접근 가능
    btype.showValue();
    return 0;
}
예제 : 접근 지정자 protected
 #include <iostream>
#include <string>

using namespace std;

class Person {
    string name;
protected:
    string address;
};

class Student : Person {
public:
    void setAddress(string add) {
        address = add;  // protected 멤버는 자식 클래스에서 사용 가능하다.
    }
    string getAddress() {
        return address;
    }
};

int main() {
    Student obj;

    obj.setAddress("서울시 종로구 1번지");
    cout << obj.getAddress() << endl;

    return 0;
}
| 접근 지정자 | public으로 상속 | protected로 상속 | private로 상속 |
| 부모 클래스의 public 멤버 | -> public | -> protected | -> private |
| 부모 클래스의 protected 멤버 | -> protected | -> protected | -> private |
| 부모 클래스의 private 멤버 | 접근 안됨 | 접근 안됨 | 접근 안됨 |
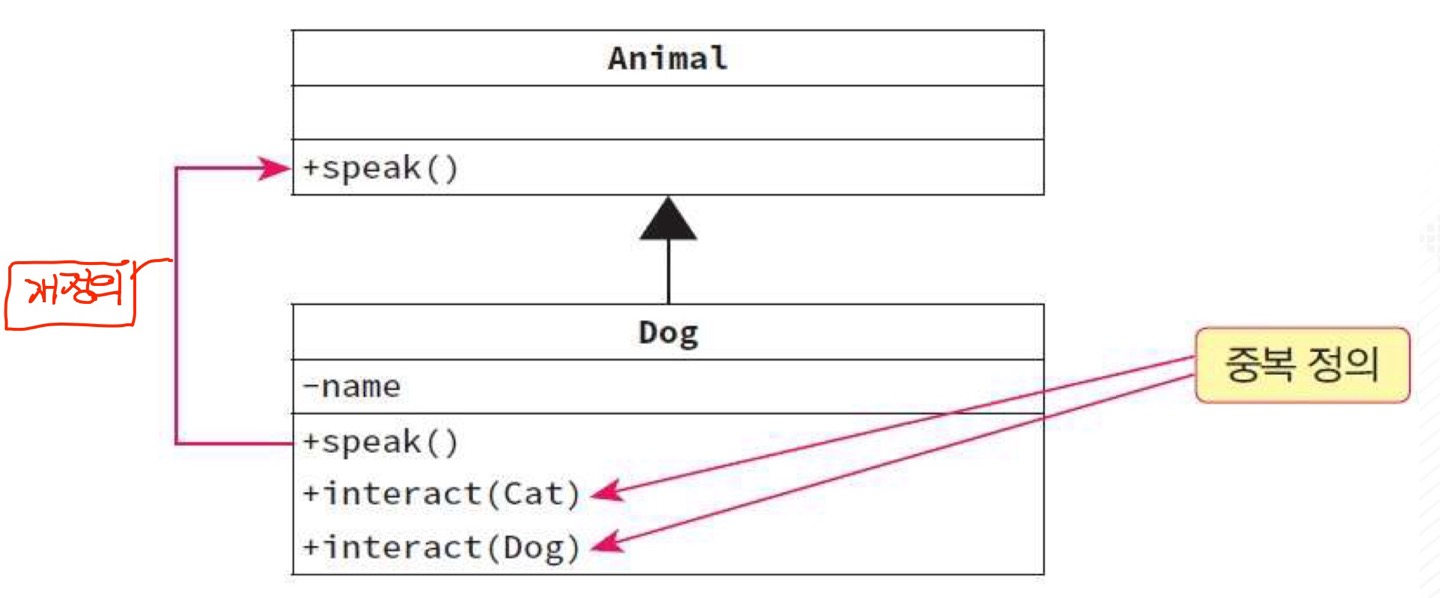
7. 멤버 함수 재정의
자식 클래스가 필요에 따라 상속된 멤버 함수를 재정의하여 사용하는 것을 '멤버 함수 재정의(오버라이딩)'라 한다.
멤버 함수 재정의 예제
#include <iostream>
#include <string>

using namespace std;

class Animal {
public:
    void speak() {
        cout << "동물이 소리를 내고 있음" << endl;
    }
};

class Dog : public Animal {
public:
    void speak() {		// 멤버 함수 재정의
        cout << "멍멍!" << endl;
    }
};


int main() {
    Dog obj;
    obj.speak();

    return 0;
}
8. 중복정의와 재정의
앞서 위에서 재정의(오버라이딩)에 대해서 부모 클래스에 있던 상속받은 멤버 함수를 다시 정의해서 내용을 변경하는 것이라고 했다.
이번에는 같은 이름의 멤버함수를 여러 개 정의 하는 것을 중복정의(오버로딩)이라고 한다. 재정의 용어와 헷갈리지 않게 주의하자. 중복정의(중복함수)에 대해서는 https://juni-tech.tistory.com/60 참고하자.
10. 부모 클래스의 멤버함수 호출
재정의되어 있는 상태에서 부모 클래스의 멤버함수를 호출할 수 있는 방법이 있다. 아래 코드를 참고하자.
#include <iostream>
#include <string>

using namespace std;

class ParentClass {
public:
    void print() {
        cout << "부모 클래스의 print() 멤버 함수" << endl;
    }
};

class ChildClass : public ParentClass {
public:
    void print() {  // 멤버 함수 재정의
        ParentClass::print();   // 재정의 되어 있는 상태에서 부모 클래스의 print() 멤버 함수 호출하기
        cout << "자식 클래스의 print() 멤버 함수 " << endl;
    }
};


int main() {
    ChildClass c;

    c.print();

    return 0;
}
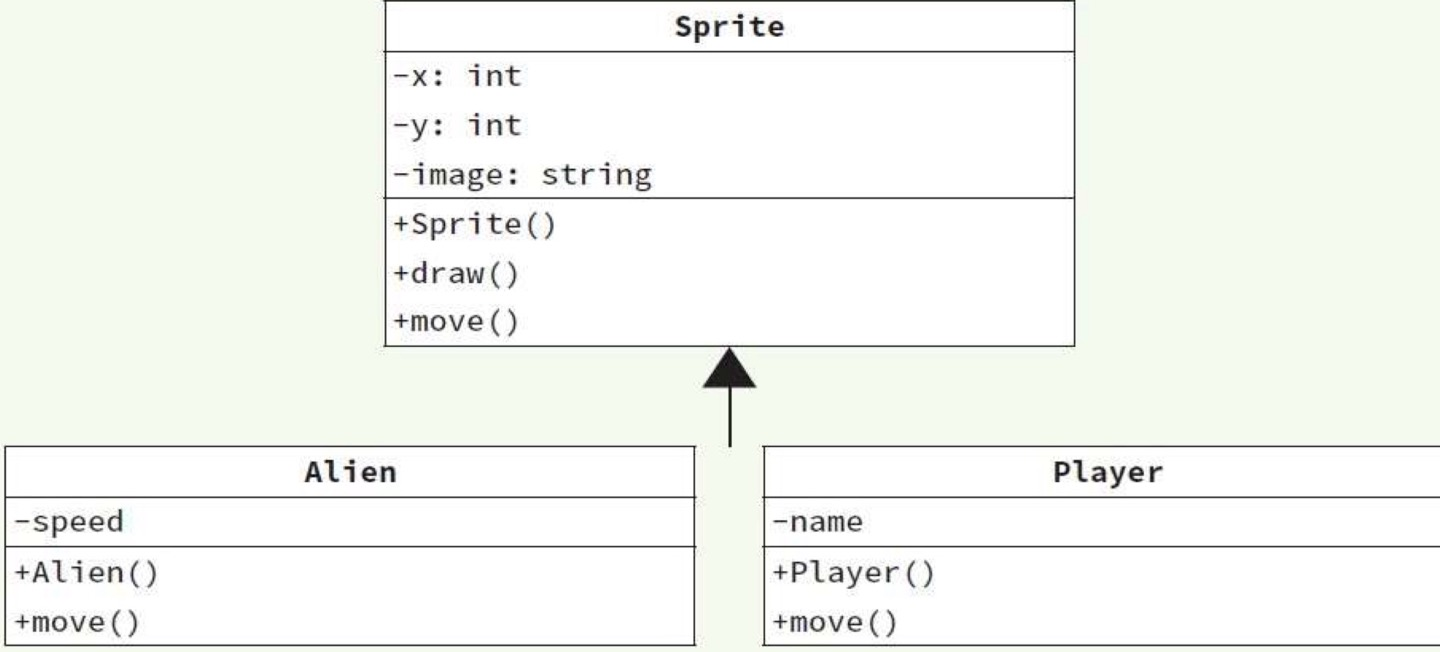
예제 : 게임에서의 상속
다음 표를 보면서 간단하게 Alien과 Player 좌표 위치와 이미지 파일명을 불러오는 코드를 작성해보자.
#include <iostream>
#include <string>

using namespace std;

class Sprite {
private:
    int x;
    int y;
    string image;
public:
    Sprite(int val_x, int val_y, string val_image) : x(val_x), y(val_y), image(val_image){};
    void draw() {};
    void move() {};
};

class Alien : public Sprite {
private:
    int speed;
public:
    Alien(int val_x, int val_y, string val_image): Sprite(val_x, val_y, val_image) {};
    void move() {};
};

class Player : public Sprite {
private:
    string name;
public:
    Player(int val_x, int val_y, string val_image): Sprite(val_x, val_y, val_image) {};
    void move() {};
};


int main() {
    Alien a(0, 100, "image1.jpg");
    Player p(0, 100, "image2.jpg");

    return 0;
}
11. 다중 상속(multiple inheritance)
다중 상속이란 하나의 자식 클래스가 두 개 이상의 부모 클래스로부터 멤버를 상속받는 것을 의미한다.
#include <iostream>
#include <string>

using namespace std;

class PassangerCar {
public:
    int seats;  // 정원
    void set_seats(int n) { seats = n; };
};

class Truck {
public:
    int payload;   // 적재 하중
    void set_payload(int load) { payload = load; };
};

class Pickup : public PassangerCar, public Truck {	// 다중 상속
public:
    int tow_capability; // 견인 능력
    void set_tow(int capa) { tow_capability = capa; };
};

int main() {
    Pickup my_car;
    my_car.set_seats(4);
    my_car.set_payload(10000);
    my_car.set_tow(30000);

    return 0;
}
#include <iostream>
#include <Windows.h>

using namespace std;

class Atype {
private:
    int a;
protected:
    int b;
public:
    int c;
    Atype() : a{ 0 }, b{ 0 }, c{ 0 } {};
};

class Btype : private Atype {
public:
    int d;

    void showValue() {
   // this가 받을 수 있는 변수는 무엇일까?
        cout << this << endl;
    }
};

int main() {
    Btype btype;
    // bbyte에 접근이 가능한 변수들은 무엇일까?
    return 0;
}